Self Service Router Metrics for OpenShift
When working with OpenShift, one of the useful sources for debug information is the OpenShift Router (HAProxy), which monitors the number of requests, concurrent sessions, response times, response codes, health check results, etc. But there are some downsides to the default implementation of HAProxy statistics!
- There is a single username and password for HAProxy, that must be shared by everyone that wants access to router metrics.
- Anyone with access to router metrics has access to metrics for all routes, not only their own routes. This is both an issue of access control and also general clutter in large environments getting in the way of actionable information.
- Understanding the data on the metrics page requires understanding how OpenShift sets up HAProxy backends.
- HAProxy exposes these statistics on a non-standard port (usually 1936), which means most firewalls will need additional configuration to allow access.
But OpenShift is a platform, and that means that we can easily extend it via the API! Along that vein, I’ve implemented an improved statistics page that fixes these issues. It provides the exact same information as the normal metrics page, except it:
- Uses OpenShift logins to provide SSO, getting rid of the shared username and password.
- Only shows users routes that they have view permissions to.
- Parses metric metadata and displays in OpenShift terms (routes and pods) instead of HAProxy terms (backends).
- Is exposed via a route like any other OpenShift application.
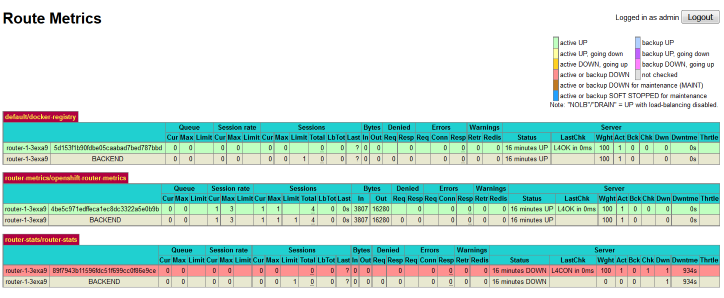
For example, here is what a cluster admin would see after logging in to the improved router metrics page:
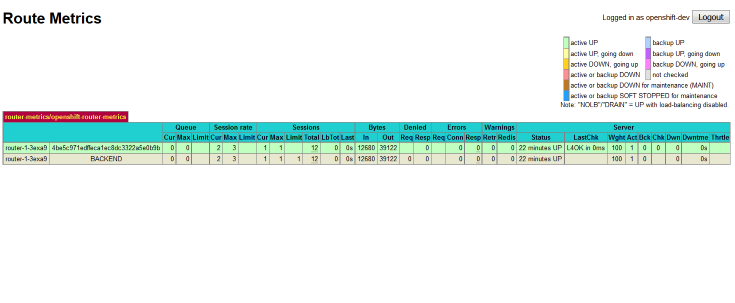
On the other hand, a non-admin user only sees metrics for routes they have access to:
Installation
Installing openshift-router-metrics is really straightforward. It requires a cluster admin in order to give the application access to the routers in the default project. Instructions for installing are in the repository’s readme, but the TLDR is downloading a template, creating it in your environment, then filling in a few parameters. Setting up the OAuthClient requires an additional step in OCP 3.3, with the release of 3.4 this might get a little easier!

